06PythonによるExcelの自動化 / Python x Excel
【目次/TOC】
1. Colabにおけるデータの読込準備/Preparing for Reading Data in Colab
6.1.1 マウント/Mount

いわゆる「PythonによるExcelの自動化」というのは,毎週,毎月,毎年行っている作業でデータだけが違うという作業であれば,プログラムを組んでしまって,更新すべきところだけ更新すればよいという考え方です。 プログラムを組む人にならなくても,基礎がわかれば,更新すべきところがどこなのかがわかり,そこだけ入れ替えれば良いわけです。仕事の引き継ぎも楽になるし,データをExcel自体でいじってしまってメチャクチャになる😢といった悲劇も起こりにくくなります。従ってここでいう「自動化」とは,みなさんの発想次第,応用次第で各種の業務の効率化につながるかもしれないスキルと知識のことです。
So-called "automation of Excel with Python" means that if it is a task that is done every week, month, or year, and only the data are different, anyone can easily reproduce the task once a program is made. Even if you are not a programmer, if you know the basics, then you know which parts need to be updated. It makes it easier to share a task among workers, and it is less likely to have a tragedy of messing up data😢 as we often do in Excel. It is up to your imagination and application how the skills and knowledge for "automation" you learn in this session can be used to improve efficiency of various tasks.
それでは実習用IPython Notebookを開いて,そこにGoogle Drive内のデータを読み取れるように,下記コード1でマウントをしましょう。
Please open the IPython Notebook for practices, and mount Google Drive in order to use data in it with code-1 below.
from google.colab import drive
drive.mount("/content/drive")
Colab Notebooksディレクトリ内にdataというディレクトリを作り,これから使うデータはそこに格納していくとしましょう。 試しに下記コード2でfoo.txtというテキストファイルを作って,"data"に格納してみましょう。
Let's create a directory named "data" in the Colab Notebooks directory for storing data we are going to use. Try creating a text file named foo.txt and store it in "data" using code-2 below.
with open("/content/drive/My Drive/Colab Notebooks/data/foo.txt", "w") as f:
    f.write("Hello Google Drive!")
!cat /content/drive/My\ Drive/Colab\ Notebooks/data/foo.txt
下記コード3でドライブに反映します。
Reflect it in your Google Drive with code-3.
drive.flush_and_unmount()
print("Colabに加えたすべての変更が,グーグルドライブに反映されました。")
drive.flush_and_unmount()
print("All changes made in Colab have been reflected in Google Drive.")
2.Pythonによるファイル操作/File Manipulation with Python
6.2.1 csv ファイルの書き出しと読込/Exporting and Reading csv Files
コード4は,入力したデータフレームをcsvファイルとして書き出します。ここでpandasライブラリーを使います。データラングリング段階でとても良く使われるライブラリーで,データ解析までカバーしています。
Code-4 enables for input data frame to export as a csv file. We will use the pandas library. This library is used very often in the data wrangling phase and covers some data analyses, too.
import pandas as pd
item_list = []
branch = input("支店記号を入力してください 終了は-1:")
while((branch) != "-1"):
    year = input("支払年を入力してください:")
    month = input("支払月を入力してください:")
    payment = input("金額を入力してください:")
    item_list.append([branch,year,month,payment])
    branch = input("支店記号を入力してください 終了は-1:")
df1 = pd.DataFrame(item_list ,columns=["branch", "year", "month", "payment"])
df1.to_csv("/content/drive/My Drive/Colab Notebooks/data/payment.csv")
print("プログラム終了")
import pandas as pd
item_list = []
branch = input("Please enter branch symbol, end with -1: ")
while((branch) != "-1"):
    year = input("Please enter the year of payment:")
    month = input("Please enter the month of payment:")
    payment = input("Please enter the amount:")
    item_list.append([branch,year,month,payment])
    branch = input("Please enter branch number -1: ")
df1 = pd.DataFrame(item_list ,columns=["branch", "year", "month", "payment"])
df1.to_csv("/content/drive/My Drive/Colab Notebooks/data/payment.csv")
print("End of programme")
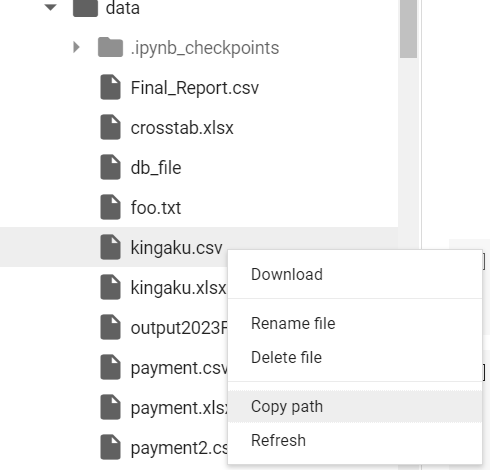
コード5では. csvファイルの読み込みをします。すでに作成しておいたdataディレクトリにkingaku.csvをアップロードしておいてから実行してください。読み込みたいファイルのパスをコピーするには,下の画像のようにファイルを右クリックして、「パスをコピー」でコピーします。
Code-5 is a practice of reading a csv file. Before running this code, please upload kingaku.csv to the "data" directory you've already created. To copy the path to the file you want to load, right-click on the file and copy the path with "Copy path" as shown in the image below.
import pandas as pd
df2 = pd.read_csv("/content/drive/My Drive/Colab Notebooks/data/kingaku.csv")
print(df2)
6.2.2 Excel ファイルの読込・統合・書き出し/Reading, Concatenating, and Exporting Excel Files
コード6では. データフレームdf1とdf2を, Excelで書き出します。そのために,openpyxlライブラリーを読み込んで,その中の to_excel()関数を使います。
Code-6 will export data frames df1 and df2 as Excel files. To do so, import openpyxl library to use its function to_excel().
import openpyxl
df1.to_excel("/content/drive/My Drive/Colab Notebooks/data/payment.xlsx")
df2.to_excel("/content/drive/My Drive/Colab Notebooks/data/kingaku.xlsx")
コード7では. globも読み込んで,dataディレクトリに入っているすべてのExcelファイルをglobで取り出します。それらを「data_list」として宣言します。 そして data_listのExcelファイル群をfor文でひとつづつlistという空のリストに格納していきます。さらにlistのExcelを読んでconcat関数で結合したものをdf3とします。 それをto_excelメソッドでtotalというExcelに書き出すときに,引数のオプションでindex=Falseとしておけば,最左列にインデックスを挿入しません。
Code-7 first imports glob. Please retrieve all the Excel files in the data directory with glob. Declare them as "data_list". The Excel files in data_list are stored one by one in an empty list called list with a for statement. Then, the Excel files in list are combineed with the concat function to create df3. When writing it out to the Excel file "total" by using the to_excel method, if index=False is set in an optional argument, the index will not be inserted at the leftmost column.
import openpyxl
import glob
import pandas as pd
data_list = glob.glob("/content/drive/MyDrive/Colab Notebooks/data/*.xlsx")
list = [ ]
for data in data_list:
  list.append(pd.read_excel(data))
df3 = pd.concat(list)
df3.to_excel("/content/drive/MyDrive/Colab Notebooks/data/total.xlsx", index = "False")
コード8では. df1とdf2をpaymentとkingakuという別々のシートとした新しいsheets.xlsxというExcelファイルにして書き出します。
Code-8 exports a new Excel file called sheets.xlsx containing df1 and df2 as separate worksheets called payment and kingaku.
with pd.ExcelWriter("/content/drive/MyDrive/Colab Notebooks/data/sheets.xlsx") as writer:
    df1.to_excel(writer,sheet_name = "payment", index = "False")
    df2.to_excel(writer,sheet_name = "kingaku", index = "False")
コード9では,月別支店別の クロス集計表を作成してみましょう。
Wih code-9, let's create a crosstabulation table by branch by month.
import pandas as pd
df4 = pd.read_excel("/content/drive/MyDrive/Colab Notebooks/data/total.xlsx",sheet_name = "Sheet1")
df4 = pd.crosstab(df4["month"], df4["branch"], values = df4["payment"],
aggfunc = "sum", margins = True, margins_name = "Total")
with pd.ExcelWriter("/content/drive/MyDrive/Colab Notebooks/data/crosstab.xlsx") as writer:
    df4.to_excel(writer,sheet_name="集計表")
import pandas as pd
df4 = pd.read_excel("/content/drive/MyDrive/Colab Notebooks/data/total.xlsx",sheet_name = "Sheet1")
df4 = pd.crosstab(df4["month"], df4["branch"], values = df4["payment"],
aggfunc = "sum", margins = True, margins_name = "Total")
with pd.ExcelWriter("/content/drive/MyDrive/Colab Notebooks/data/crosstab.xlsx") as writer:
    df4.to_excel(writer,sheet_name="crosstab")
少しずつコードが長くなってきました。 Pythonはスペースを無視するので,見やすくするためにスペースを入れても,入れなくても結果は同じです。Pythonコードの書き方にはたとえば演算子(+など)の両側に半角スペースを入れるなど, ゆるいしきたりpep8があるますが,結果が出れば基本的に自由です。
The code is getting a little bit longer. Python ignores spaces, so spaces are only for the the legibility. There is a conventional way pep8, but how to write code is basically flexible.
以上のスキルを修得すれば,たとえば今年度のデータを入力したものを昨年度のデータに結合し,Excelに書き出したり,クロス集計表を作成して各支店の月別の動向を比較したりできます。 そしてそれを1回作成すれば,次の年もまた次の年もそのプログラムを使えば同じ作業ができるようになりますし,結合したいExcelを同じディレクトリに入れておけばループ処理を使ってすべて結合してくれる,つまり「自動化」されるわけです。
Once you have mastered the above skills, you can, for example, input data for the current year, concatenate it with the data of the previous year, export them to Excel, create a cross tabulation table to compare monthly trends at each branch, and so on. If you create it once, you can use the program to do the same work from the next year on, and if you put the Excel files you want to combine in the same directory, the program will combine them all using a loop process, in other words, "automating" the process.